BEFORE YOU BEGIN
WHAT’S INCLUDED
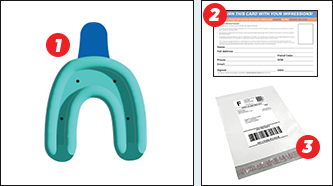
The contents of your kit may vary depending on the your purchase! Everything you need to make a quality impression has been included with your kit.
-
1
UPPER IMPRESSION TRAY Blue impression tray with impression material preloaded so you are ready to boil & make impression.
-
2
CONSENT CARD (included in your kit): Consent card must be filled out and returned with your dental impressions or your trays cannot be made!
-
3
RETURN ENVELOPE: Return bag with prepaid postage (US-customers only).
IMPORTANT: If you have braces or a permanent retainer, you should not attempt to use this product. Before making an impression, please remove retainers, false teeth, or any other appliances that are removable.
PREPARE FOR IMPRESSION
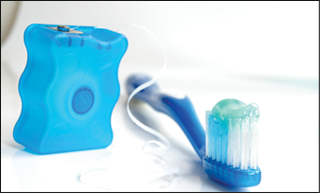

Start by brushing and flossing thoroughly. Clean teeth are important for the perfect impression.
Make sure you have in front of you:
- Pot / pan for boiling water
- Cooker / stove top
- Free-standing table mirror
- Timer / stopwatch
- Clean hard surface
- Tissues for excess saliva
- Tongs or large slotted spoon
AT ANY POINT YOU’RE CONFUSED OR HAVE QUESTIONS, Email, call, or visit our website to use the live chat feature available...we can help!
MAKING YOUR IMPRESSION
BOIL IMPRESSION TRAY & COOL
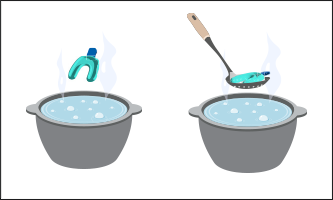
Don't over or under boil the impression tray! Make sure the impression tray sits in the boiling water for exactly 1 min 30 secs. Take impression out of the water and allow to cool for 3 minutes.
Make sure your pot is large enough and has enough water to completely submerge the impression tray. The pot, water, and impression tray will get hot so be careful!
- Use high heat to bring pot of water to a boil.
- Place impression tray in pan for exactly 1 min 30 sec.
- Remove impression tray from boiling water with a large slotted spoon and allow to cool for 3 minutes.
- Immediately proceed to the next step.
MAKE YOUR IMPRESSION
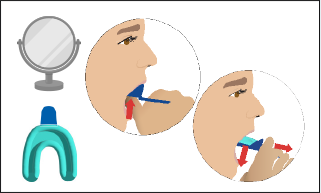
Simple tips! - A mirror helps! Its better to leave it in too long rather than not long enough. Teeth AND gums should be in the putty. Don't wiggle while making impression.
- Put the entire impression tray in your mouth. Do NOT bite.
- Place both thumbs on the back of the tray (where your molars are).
- Gently press teeth into the putty ensuring that all the teeth enter the putty at the same time. Do NOT bite.
- Make sure the putty gets up onto the gums. Gently press overflow material into gums. Do NOT bite or wiggle while hardening.
- Hold in place for a minimum of 4 minutes. Do not wiggle the impression or talk. Use paper towel to clean up excess saliva.
- Continuously check the hardness of the material with your finger.
- Once cured, pull down on the tab remove impression. Don’t press the putty with your fingers. Leave impression in the tray.
VERIFY IMPRESSION QUALITY
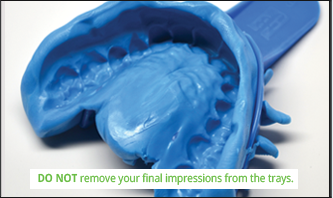
IMPORTANT! - Save yourself time and money by sending us a picture of your impression! If you’re unsure of the quality, email our team at [email protected] and we’ll respond quickly!
- Can you clearly see your teeth and the line where your teeth meet your gums?
- Any signs that the putty was not hard enough (drag marks or warped teeth?
FLIP INSTRUCTION BOOKLET OVER TO SEE EXAMPLES OF BOTH GOOD AND BAD IMPRESSIONS.
Let the impression sit for 3 minutes and then rinse with soap & cool water. Do not place impressions into shipping bag until they have hardened. If impression quality is not good, follow redo instructions.
REDO PROCESS (if necessary)
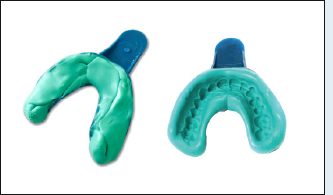
You can try again! - If the impression quality isn’t great, you can reheat the material, fold the excess material back into the tray, and do it over. Just modify the boiling and cool times as per instructions below.
- Take the impression and place it back into boiling water for 1 min 30 secs.
- However, this time, allow the impression to cool for 2 min 30 secs after boiling.
- Remold by pinching the sides of the over spilled putty and fold them back to its original state. Keeping the channel to align your teeth visible. You have 30 seconds to do this.
- Repeat the impression process outlined in previous instruction. Don't worry, if you mess up again, you can follow these instructions and retry again!
MAIL IT IN...YOU’RE ALL SET!
TAKE A PICTURE OF RETURN POSTAGE
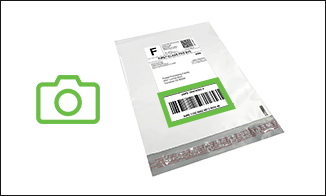
IMPORTANT!- This is your unique tracking number and we do not know it! If your package gets lost or misplaced, we will need your picture.
Take a picture of the tracking information on your return envelope. You can use this information to track the delivery of your impression to our lab.
ONE-TIME OFFER COUPONS!Save up to 50% off Smile Brilliant products by clipping the coupons on the back of the instruction manual included with your impression kit and returning them with your impressions.
RETURN EVERYTHING TO OUR LAB
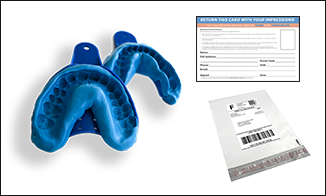
IMPORTANT! If you do not fill out the consent card included with your kit, your order will not be processed! Don't forget it!
- Use the prepaid postage bag (US customers) to return your impressions and consent card
- Make sure you fill out the consent card and return it or you your order will not be processed!
- On the back of your instruction booklet (included with your impression kit) are a series of one-time use coupons. Save up to 50% by simply clipping the coupons, and send them in along with your impressions and consent card.


