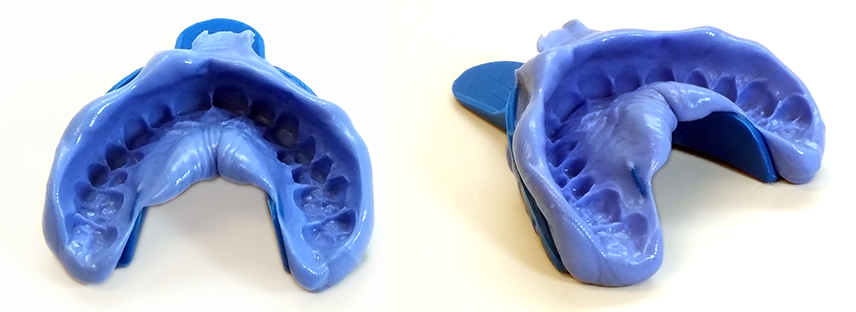
In order to ensure you take the best possible dental impression it is strongly encouraged you read the instructions provided with your kit several times prior to taking the impressions. Of those dental impressions we receive from customers, roughly 1/29 are not satisfactory. Among the most common errors we see are:
- Too shallow
- Scraping on the walls of the tray
- Unmixed material
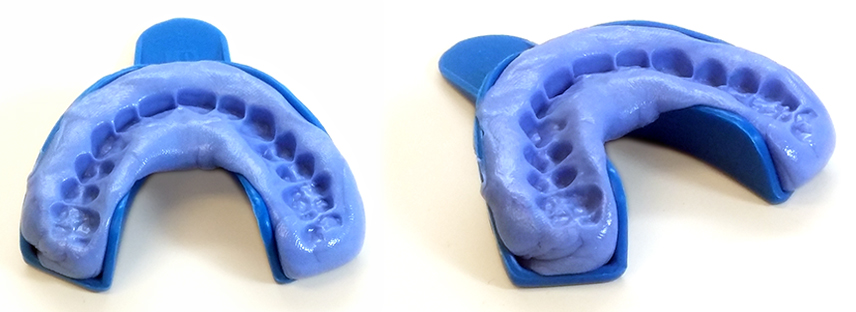
Excellent Dental Impression
Prior to going into how not to take a dental impression let’s look at what a good dental impressions looks like. Notice the impression goes deeper than the gum lines on all teeth (front and rear). The impression material was mixed until it was a solid blue and there is no noticeable distortion which is caused when removing the material before it has hardened.
Shallow Dental Impression
We receive 2 types of shallow dental impressions with the most common being the front teeth go deep enough, however the molars are not. Granted we can still make trays from this type of impression, your trays will not cover all of your molars.
To avoid shallow molars be sure to position your thumbs on the back of the tray and push evenly into the teeth.
The second most common shallow dental impression is where all teeth did not sink into the impression material. At times it is close enough which allows us to forge the rest however it will be far from a perfect tray. Shallow dental impressions are usually the result of the person mixing the dental impression material for too long. Once the material is mixed it triggers a hardening process. Over time the material gets harder making it difficult to sink your teeth all the way into the material.
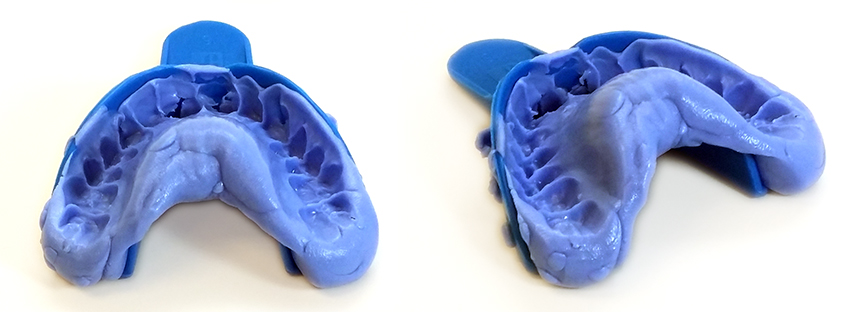
Scraping The Walls of The Impression Tray
When inserting the impression tray in your mouth it is very important you position your teeth in the center of the impression material. Failure to do so will result in your teeth scraping the walls of the tray. Granted we can attempt to make a tray using the impression shown, it is doubtful it will fit to your satisfaction.
Notice the slight hole in the impression where the K9 tooth is. If the rest of your teeth did not scrape the walls of the tray this minor hole would not be an issue.
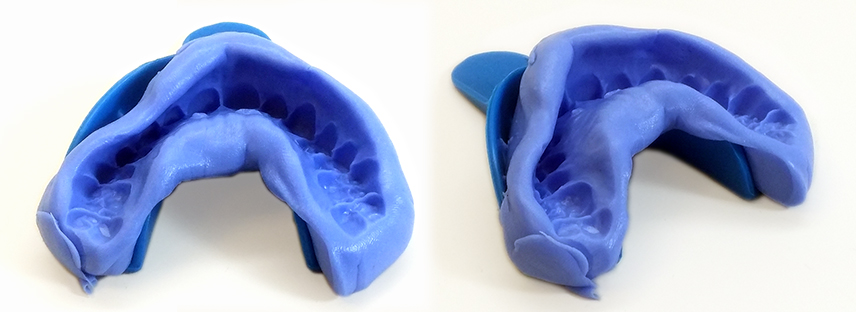
The walls collapsed inward on the impression
Had the front wall not collapsed inward on this impression it would have been a perfect dental impression. The reason this impression collapsed inward is likely because the customer did not allow the material to harden enough before removing it from their mouth. It’s important to leave the impression in your mouth for a minimum of 2 minutes however 3 minutes is optimal. The material will still not be fully hardened; however it will be firm enough to remove with minimal to no distortion.
Be sure to let your impressions sit for 30 minutes prior to placing it in the envelope.
Unmixed Impression Material
It’s not often this occurs however on occasion we do receive an impression where the material has not been fully mixed. Failure to mix the material until it is a solid blue color will result in the material never hardening. We have no way of making satisfactory trays from these impressions.


